Showing posts with label Food tips. Show all posts

Wednesday, 19 November 2014

Stuffed Chicken Thighs with Gravy


I like stuffing chicken thighs (or breasts) to add to the flavour, and give a bit of variation to every day meals. I don't always like the hassle of making the stuffing though so will often substitute a ready-made one. I cooked these stuffed chicken breasts for our dinner the other night and my youngest son loved them.

Stuffed chicken thighs with gravy

This recipe serves 4
Bacon wrapped chicken thigh with sage and onion stuffing


You will need:

4 chicken thighs, with bone removed
1 pack sage and onion stuffing
8 slices bacon
Black pepper
Olive oil


Method:

  1. Prepare the sage and onion stuffing per the directions on the box. The type I use you just pour the contents into a bowl and add about 200ml cold water, give it a stir then let it sit for 5 minutes.
  2. Place two slices bacon on the cutting board, lay the thigh flat on top. Place a spoonful of stuffing into the middle and roll up the thigh around it with the bacon.
  3. Drizzle a bit of olive oil into the bottom of a baking tray and place the wrapped thigh on top. Drizzle a bit more olive oil over the top if desired and sprinkle with a bit of black pepper.
  4. Bake in a moderately hot oven for about 30 minutes, until the chicken is cooked through completely.
  5. The gravy can be made relatively easy.
  6. Melt a small amount of butter in a saucepan. Add a spoonful of flour and cook, stirring constantly for 2 – 3 minutes. Pour in 1 pint chicken or vegetable stock, a bit at a time, until the desired consistency is reached. Season with pepper. I find that most store-bought stocks are salty enough so don't add any more salt unless you taste the gravy and think it's needed. To lift the flavour just a tiny bit more, try adding a ½ teaspoon of malt vinegar.
  7. Serve these stuffed chicken thighs and gravy with a seasonal green vegetable and mashed potatoes.


If you'd prefer to use chicken breast…

This dish can be made equally well using chicken breasts. I just prefer the flavour of the thighs, plus they're cheaper.
You can either butterfly open the breast, or cut a pocket into the centre before stuffing the breast and wrapping it in the bacon. 

How to

Debone a chicken thigh:

Place the thigh skin side down on a cutting board. Using a sharp knife make a cut on either side of the
Slide the knife under the bone
bone, slide the knife underneath the bone on one side and run it down the underside. Then detach it at the top and bottom.

Butterfly a chicken breast:

Place the breast skin side down on the cutting board facing lengthwise away from you. Using a small sharp filleting knife, cut 2/3 straight down the middle, perpendicular to the board. Turn the knife at a right angle and now cut parallel with the board 2/3 of the way through one side, and then the other. Fold open the breast to either side. If the breast is especially thick, you may want to make another parallel cut to fold it out a second time.
You can then place a spoonful of the stuffing into the centre and wrap the breast around it.

Open a pocket in the breast:

Place the breast on the cutting board with the thicker side closest to you. Using a sharp filleting knife make a cut through the centre of this thickest part at the side, cutting parallel to the board and using your non-dominant hand to hold the breast steady on the board. Move the blade back and forth to enlarge the pocket while taking care not to cut through the other sides or through the bottom.
Using a spoon or (as I do) your fingers, push a small amount of the stuffing into the pocket.


Why bacon?

I will either wrap the breast in streaky bacon or will use the reserved skin from off the breast to wrap the chicken once stuffed. This helps to keep the meat moist while adding flavour as well as keeping the whole thing from coming apart while cooking. Feel free to omit and use cocktail sticks, or use a lower-fat bacon if you desire.

Sunday, 5 January 2014

A Well Stocked Larder Makes Cooking Easier

I am lucky in my tiny kitchen to have a space with shelves where I can keep canned and dry goods for the
Left side of larder
kitchen.But really, any cupboard or a seldom used closet can be set aside and have a few shelves added. It doesn't even have to be in the kitchen!

These are things that I like to buy in bulk when they're on sale because they won't go off quickly. They're also handy for last minute meals and snacks.

I know, that if all else fails, I can always pull a few tins out of the larder to put together a meal. And as much as I enjoy cooking, if I am feeling sick and not up to cooking a meal from scratch, or if the weather keeps me from getting to the shops, I need something that I know I can put together without a lot of fuss and bother.

Since I have these items to hand, I am hardly ever caught short when it come to cooking. Here, I have my dried herbs and spices, jars of peanut butter, jam, and sandwich spreads, flour and sugar, assorted pasta and dried beans, and in a couple bins near the floor my onions, potatoes, and garlic.

Old coffee jars have been repurposed to hold bulk spices - be sure to label everything! Unless you want to spend all your time sniffing jars trying to figure out what is in them. 

These are the items I have in my larder.


Top shelf

Pasta - spaghetti and farfalle (the only 2 pastas my 11 year old will currently eat)
Center shelves of larder
Rice - brown rice, basmati rice, and risotto rice
Quinoa
Popcorn
Dried beans - pinto beans, butter beans, lentils
Breakfast cereals - besides the sugar laden stuff the kids like, I keep a bag of rolled oats and a tub of muesli
Basket of assorted bulk packets of dried herbs and spices - including dried chillies

Second shelf down

Jars of spices
Jars of dried herbs
Mustard powder
Different types of mustard - English, whole grain, honey
A small jar of anchovy fillets
A small jar of capers
Salad creams and dressings
Corn flour

Salt
Extra packs of biscuits

Third shelf down

Tinned goods - chopped tomatoes, beans (kidney, chilli, chickpeas, butter beans, and refried beans)
Sandwich spreads - peanut butter, jam, chocolate-hazelnut spread
Tomato puree and paste

Tinned fruit
Tinned soups
Cocoa powder
Tinned fish - tuna, salmon, and sardines

Fourth shelf down

Drinks - assorted squashes, tea bags, and hot chocolate
Dried milk
Flour - plain flour and bread flour
Corn flour
Sugar - caster, granulated, and icing
Tub for onions and garlic
Large bag coarse sea salt
Dried yeast

Floor

Tinned dog food
Dry dog food in a plastic container
Large bottle cooking oil
Tub for potatoes

When something starts to get low, I add it to my shopping list and replace it the next time round.

As you can see from the pictures, my shelves are not meticulously organised. But, I have a general idea of where things will be when I go to get something out. 


Monday, 25 November 2013

How to Chop an Onion

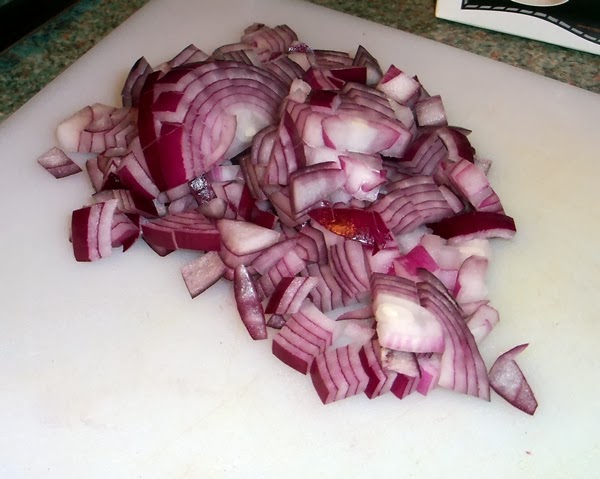
Chopped red onion
If your kitchen is anything like mine, a good deal of time with cooking each day is taken up with chopping onions. Nearly every recipe has at least one sliced, diced, or chopped onion in it. This is why knowing how to chop an onion safely and quickly is a very good skill for even the casual home cook to have.

It starts with a sharp knife

I cannot emphasise enough how important having a sharp knife is when you're chopping an onion. Do you ever wonder how it is that chefs can chop onions so quickly? It is because that knife is extremely sharp!

These days, I chop onion, peppers, and most other vegetables using a ceramic knife. These hold an edge better than any other knife I have found, and are easy to care for and maintain.


Step-by-step instructions for chopping an onion

1. Top and tail the onion, then cut it in half through the stem.


2. Remove the papery outer covering


3. Make 2 - 3, or more horizontal cuts through the onion half, leaving the stem intact. The number of horizontal cuts you make will help determine how large the chopped pieces will be


4. Make several vertical cuts through the onion, leaving the stem intact. Make these cuts between 1/2 and 1/8 inch thick depending on how large you want the onion pieces to be. The natural striations on the onion are a useful guide for cutting.


5. Slice through the onion, starting at the head and working down to the stem. This last bit can be thrown into the compost or tossed into a pot with other end bits to make a stock.


And there you have it, one onion completely chopped. And once you've gotten a bit of practice in, you'll be able to do your chopping in less time than it took to read this how-to guide.

Happy cooking!

Wednesday, 20 November 2013

How to Chop a Sweet Bell Pepper


Bell peppers 

Sweet peppers, bell peppers, green peppers, red peppers, capsicums.

We have a lot of names for this particular vegetable (and yes, technically it is a fruit). It can be eaten raw or cooked. It freezes well. And it comes in a wide range of colours depending on the level of ripeness.

It also is filled with a lot of tiny seeds and it seems no matter how carefully you cut a pepper you always end up with those tiny little seeds scattered across your kitchen counter.

Until now!


About Sweet Bell Peppers

The bell pepper originates from Mexico, Central America, and the northern part of South America. It is a member of the Capsicum family which includes chillies. The sweet pepper is the only variety of capsicum however that does not produce capsaicin, the chemical in chillies which gives them their burning heat.

Most people eat the bell pepper in its unripe, green form. Once it ripens though it can turn beautiful colours of red, orange, yellow, and even a deep purple.

Peppers were carried to Europe by Columbus in 1493 and from there spread to the rest of the world. It was Columber who first called these fruits Peppers, though they are in no way related to the Piper nigrum, which produces black peppercorns. At the time, the name pepper, or pimenton, was given to any spice with a hot and pungent taste.

Chopping a Pepper

Step 1

Cut or break the stem off the pepper so that it can sit evenly on your chopping board. I sometimes do this at the grocery store if the stem is particularly long and I am paying for the pepper by weight. 

Step 2

Place the pepper stem side down.
Using a sharp knife and the lines on the peppers for guidance, cut off one of the sides of the pepper. Being careful not to cut into the seeds at the center.
Slice off the remaining sides in the same way.


Step 3

Trim off any of the white membrane remaining on the pepper sections.

The pepper can then be sliced, or chopped, for use in cooking.

It can also be frozen for use in cooking later. I like to chop several peppers at once, when I buy them on special, and keep in the freezer. I can then just break off a handful of the chopped peppers and put it directly into the food dish for cooking.

Discard the central core into your compost bin, or save the seeds to plant at home.